Wednesday, March 12, 2008

Collecting buttons


Buttons are not only an accessory meant for fastening clothes or for giving them a stylish look but they are also a popular collectible item. Many people love to collect buttons, as most of them are works of art and beauty.


History of button collecting


The word ‘Button’ has originated from the French word ‘Bouton’ meaning bud or protuberance or any round object.For almost 3,500 years, buttons were worn as ornaments and not as cloth fasteners. They were a status symbol and craftsmen were hired just to make beautifully crafted buttons from precious materials. Greeks and Romans are thought to be the first to use buttons to fasten clothes. The practice of buttoning a garment originated in Western Europe in the 1200s.Some of the first button collectors in the US were young girls, for legend said that once a girl has collected 1000 buttons on her charm string her Prince Charming would arrive. Nowadays, many societies and organizations exist in the Western countries that bring together button collectors and facilitate the exchange of antique buttons.


Kinds of buttons


Look around you. Apart from the ordinary plastic ones, buttons are made from glass, wood, fabric, metal, brass, ivory, ceramic, bone and even silver and gold. They come in all shapes and sizes and are available in a variety of colours. Some have miniature scenes painted on them while others are exquisitely carved, inlaid or stamped.


Button crafts


You can make many different crafts from buttons if you use your imagination. Here are some ideas:Fill a clear, transparent glass jar completely with different coloured cute buttons of every imaginable size and shape. Now put the lid on. This is not only a safe place to keep your buttons in, it also makes a good decoration piece.Or, take a white piece of cloth. Draw any scenery on it and add colour to it by sewing various coloured buttons on it.If you are interested in sewing and need a pretty container to keep your needles and thread in, take an empty cardboard or wooden box. Cover it completely by pasting many buttons of various colours on it. There! Your box is ready.


Advantages


Buttons are very cheap. They are easily available, too. You can add to your collection by taking out buttons from old and used clothing and garments. But be sure not to meddle with new clothes or your Mom will be after you!!!

(Saadia Daud)

Collecting pictures


Pictures sometimes convey more than words do. That is why they have an irresistible appeal and most people love to collect them. You too can start a picture collection if you like.


Sources


You can collect pictures on virtually any topic imaginable. Pictures can be cut from magazines, pamphlets and newspapers or they can be printed from the computer.But before cutting any pictures from a magazine or a newspaper make sure that everyone has read it and that nobody else needs it. Also don’t spoil any books for the sake of adding a new picture to your collection.


Some great ideas


Pictures have lots of uses. They not only add colour to your homework assignments and projects but also make them more interesting.You could also make a picture book for your younger siblings. This will not only keep them busy but also earn the praise of your mom. You could donate some handmade picture books to an orphanage and bring sunshine in the lives of other children too.Or make a collage. Just stick the pictures that interest you on a chart paper in a haphazard way and see how beautiful your collage looks once it is finished. Put it on your side table or hang it on your bedroom wall for all to see and admire.Pictures might also come handy if you make your cards by hand. Choose pictures which best describe your feelings or which are suitable for the occasion and paste them on your card. Write some poetry or quote and give it to a loved one.Classify your pictures in broad categories like animals, flowers, people etc. and paste them in separate scrapbooks. This could be a good pastime and will ensure that your pictures remains safe.Otherwise, hold an exhibition of your collection and invite family members, friends and loved ones to see and share your cherished pictures.


Advantages


This hobby is quite inexpensive and you don’t require much material for it. All you need is scissors, glue, old magazines, a folder to keep pictures in a scrap book, imagination and some great ideas!Moreover, it can be pursued by teenagers as well as younger children and is not at all difficult. It will also guarantee many happy hours.So arm yourself with a pair of scissors and attack some old magazines and newspapers. Happy collecting!
(Saadia Daud)

Tuesday, March 11, 2008

Building doll houses

Do your tiny dollies need a place which they can call home and where they can rest and relax and play and live? If not, then why not build a doll house for them. Doll houses are available at most toy shops but they are very expensive and fragile. Besides it is more fun to build your very own doll house according to your own preference. So start building one right away.


History


The earliest doll houses were made in Bavaria and Holland in the late 16th century and were more like cabinets than houses. In the 17th and 18th centuries, rich people used to have an exact replica of their own house, mansion or castle made. These were not considered doll houses but were placed prominently for all to see and admire.The most famous example of a doll house is the Queen Mary’s doll house which is on display at the Windsor Castle. Today collecting and building doll houses is considered a popular hobby.


Getting started


To make a doll house take as many empty shoe boxes as the number of stories you wish to make of your doll house. Now paste one box upon the other till the desired number of floors has been reached. It is better not to have more than three stories.Then divide each floor into two rooms by inserting a cardboard in between each shoe box. After that cut out the doors and the windows. For the doors, just cut out three sides so that you can also shut the door whenever your dolls need some privacy. Don’t forget to make the connecting doors which lead from one room to another.Apart from shoe boxes, you can also make the doll house with wood. In that case, it would be advisable to get help from a carpenter.


Decorating the exterior


The exterior can be painted or covered with a coloured paper. Or it can be decorated with tiny brown bricks that you can make by sticking brown paper cut into rectangles on to the wall.You can also make a boundary wall to enclose your doll house. Inside that wall, you can make a tiny flower garden or a car porch by odds and ends that you can find around the house and that can help to give your doll house a really homely look. Furnishing the house.First paint the rooms or stick some wrapping paper on the walls to look like wall paper. Next give the floors a tiled look or adorn them with pieces of carpet that you have at hand. Also make tiny curtains with tissue paper or any other piece of cloth and paste them above the windows.Now you are ready to add pieces of furniture to your house. You can make these with empty match boxes or cardboard or plasticine or even wood! Just use your imagination and create a match box crib for the nursery, a sturdy wooden chair for the dining room and a bowl of yummy fruit made with plasticine for the kitchen! Another idea is to buy tiny furniture and accessories from a toy shop to decorate your doll house.Once you have arranged everything according to your liking, just add the dolls and let the fun begin.


The magic of doll houses


The hobby of creating doll houses and furnishing them is very rewarding, imaginative and satisfying. Moreover, it is never-ending. You can always add one more piece of furniture or tiny accessory to your doll house.Doll houses have a timeless appeal and they will continue to fascinate all those who admire miniatures of all kinds!
(Saadia Daud)


Knitting - A fascinating art

Apart from the chilly wind another sign of winter’s arrival is the emergence of our moms’ hobby . We find mother sitting on an arm chair, holding yarn and needles, controlling and winding the yarn around her fingers, casting on, and knitting away.
The word ‘knitting’ comes from the old English word, ‘knot’. Early Victorians were legally obliged to teach this art to their children — both girls and boys. Today, apart from being an important source of income, knitted garments are in fashion. A great collection can be found at leading couturiers. Knitting is also used in making wall hangings and various other decorative items.
Generally, we think that knitting is a women’s job. However, in the past it was often tribal men, skilled at the craft, who used to knit while, watching over their flocks in the fields, and there was no shortage of material. Their women gathered wool from animals, spun yarn which they cleaned at home for their men. The articles produced were scarves, robes and socks.
Obscure history
It is not possible to give its exact date of birth but it has grown with civilization. It is believed that it first developed about 3000 years ago among nomadic tribes, in Arabian deserts. Another knitting sample has been found dating from the time of the ancient Egyptians. Sailors and Crusaders spread this art, like many other crafts, across the known world.
In many countries fishing villages had a knitting tradition. Each village had its own special stitches and fishermen could be identified by their jersies ashore. Jersey and Guernsey are also names of particular fishermen garments.
Between AD1000 and AD1200 Egyptians made ‘coptic caps’ - knitted caps, worn by monks and missionaries. Egyptian craftsmen carried this knowledge to Spain, then to Italy and France, later it was passed on to England and the New World — all over the Europe. By the middle ages knitting became a common craft. Under Church patronage, Italy and France became its mediaeval home with organized guilds.
England was the world leader in knitting. During Queen Elizabeth I’s reign fine work was being produced by master craftsmen. Gradually it became an important village industry in the dales of Yorkshire where fine wool was available.
In England, during the 19th century after the Industrial Revolution this handicraft declined but was soon revived. Although machine knitting had gained popularity this ancient craft, using needles was popular than it has been before.
Once you have cast the stitches then you can hold the yarn and needles comfortably — it’s very easy to begin. If you want to try knitting or knotting your best instructors are your granny and mom. Basic knitting stitches are ‘knitting’ and ‘purling’. If you want to learn more, beginners project books are available in the market at reasonable cost. It is essential to collect your tools of trade before you start, including yarn and needles, in addition you’ll need scissors, sewing needles, metal scale, a cloth or polythene bag in which you can keep your work clean.
Always follow these hints before beginning: wash your hands; to keep your knitting clean, keep it in a bag; never leave knitting in the middle of the row it spoils the line work; never stick needles though a yarn ball it spilts yarn; when measuring, place work on flat surface and measure it in the centre not at the edges and never knot new yarn ball in the centre row always join at the beginning. So lets’ try. (Amna Nasir)

Monday, March 10, 2008

Grow a miniature garden


Do you have green fingers but are restricted by space? Don’t worry, grow miniature gardens. They are fun and easy to grow and wonderful to look at. So get hold of some containers and start today!


History


Miniature rock gardens constructed in hand hewn troughs or on rock slabs were first developed over 1000 years ago in Asia particularly in China and Japan and then brought to England in the 1820s and the 1830s. They are also known as sink gardens in England. In China, the art of creating miniature landscapes in a container is called Penjing.


Getting started


You may use a tray, a stone trough, an earthenware bowl or even a glass bottle to grow your garden in.


Put some broken bits of flowerpot and some small rocks at the bottom of your container and then fill it with some soft brown earth. This bottom layer of rocks will ensure that your plants will not become water logged. Now set some small plants in your garden. Be careful that these should be such plant varieties that are either dwarf or slow growing. You could even plant coriander or green pepper and keep it small by regular pruning.


Decorations


Decorate your miniature garden with gravel, small pebbles, elf-sized boulders, driftwood, seashells or other props, which can be objects you find around the house. You could even make a fence around your garden with small twigs or toothpick. And stones could be arranged as a rockery or to give the impression of small caves and hills.


Care and maintenance


Like big gardens and lawns, miniature gardens also need your love, care and attention. They need to be kept in a bright, sunny spot like on a windowsill and must be watered regularly. But don’t give them too much water, as this will damage them.


It is also essential to pluck the upstart weeds and to prune the plants so that they don’t outgrow their container. And, any plant that outgrows its environment must be replaced.


Advantages


Miniature gardens are intriguing as well as cute. They capture the atmosphere and magnificence inherent in a natural landscape and create a place where it is almost possible to imagine anything. So they fire one’s imagination and give one a chance to be creative.


Moreover, in a miniature garden, plants are closer to eye level and so easier to appreciate. This hobby is a perfect stress relieving aid but the best thing is this that it costs you nothing. So anyone can become an expert gardener in no time!
(Saadia Daud)

Sunday, March 9, 2008

Baking


Sumptuous pizzas, huge spicy fruit buns, tasty cherry cakes, moist, chewy, chocolate brownies, crunchy biscuits, irresistible chocolate fudge cakes so wonderful to imagine, arent they? But to tell you the truth they aren't all that difficult to make too if you follow directions, mix the ingredients in the right proportions and if your oven is in perfect order.Baking is quite an interesting and rewarding hobby and very enjoyable too.

Important Equipment

Baking is a process by which articles of food are cooked entirely in the oven. So the first and foremost thing that you need is an oven. Other things that you will require are baking trays, large roomy mixing bowls, wooden spoons for mixing, a rolling pin, sieves, cutters, scales, nylon piping bags with nozzles, whisks, measuring jugs, palette knives, etc. etc.


Cool Tips

1- Never open the oven door until the cake is at least three-quarters cooked according to the time given as this lets in cold air and might spoil your cake.


2- Always give your flour a good airing by sifting it two or three times.


3- Eggs to be used should be at room temperature and not too cold.


4- Dont keep yeast longer than two months before using.


5- Insert a skewer in the center of the cake, if it comes out clean the cake is cooked.

Enjoy Baking!

Home made goodies taste good and cost less than those bought from the bakery. They can also be symbols of friendship and love for if someone takes the time to bake something for you then that means he or she cares about you. So surprise others with your baking talent and get the praise which is your due!
(Saadia Daud)

Saturday, March 8, 2008

Collecting soft toys


It is always difficult to pass by a display of cherubic, fluffy stuffed or soft toys with their inviting, sparkling eyes, without stopping to buy one. They are simply irresistible. These cute and cuddly balls of fur warm and charm all hearts, making them really good collectible items. Making your own soft toys You can make your own soft toys if you are good at sewing. You will require materials like plush, felt or velvet, scissors, thread, needles, beads for eyes, ribbons, cotton for stuffing etc. And that’s not all. You’ll also need loads of patience and love whilst creating your very own soft toy. Many books are also available on this subject, which illustrate the step-by-step procedures of making such toys.
(Saadia Daud)


Friday, March 7, 2008

Pot Painting

As the name suggests, it is a hobby in which a person decorates clay pots and vases in various ways. It is a very interesting hobby as the results are often quite diverse (from what you expected!) and creative. One does not even need to learn it from any one nor are there any hard and fast rules to be followed. This hobby is as old as the art of pottery itself and nowadays it is gaining momentum and one can see various artisans selling painted pots on the roadsides. What is best about this hobby is that one need not learn it from anyone, as all it needs is creativity and, of course, some pots.

Material required

Pot painting is not very expensive as most of the things needed such as clay pots, vases, paints, brushes, ribbon, tooth picks, macaroni, thread, stencils, plaster of Paris, glitter (or whatever else strikes your imagination) are mostly available at home. Some things, however, such as spray paints (which are a wee bit costly), clay pots and vases (you can even use the ones in your garden) and enamel paints and, if you need, dust (which comes in different colours such as silver, gold, bronze) etc. needs to be brought from the shops. These things can be bought from hardware shops or any arts and crafts store.

What to do now

Good question! Once you get hold of these things the options are endless. You can make miniature drawings on pots and colour them, do collage work, try the thread, stamp effect (which can be made by taking a long piece of thread rolling it in dust mixed with turpentine oil (mati ka tail) which can then be applied on to the pot), drip paint on the pot to create funky designs which is called the dripping effect, make the marble effect, decorate a cut work pot with laces and ribbons (which make excellent lamps), do stencil work on the vases and then fill them up with rice etc., make things out of Plaster of Paris and stick them on the pot with glue or you can even put some plain bajri mixed with paint onto it and sprinkled with glitter to give it a shimmering effect!!! You can even mix a lot of different effects together. (After all, it is about being creative!)

Tips and tricks

One very good and time proven advice while painting any stuff is to always wear an apron and cover your working area or else it’ll only flare up your mom’s temper. Also while working with spray paints always keep them as much away from your face as possible as most of them are toxic. After using enamel paint, the brushes usually get stiff and become useless. One good trick is to dip them in turpentine oil (mati ka tail) for some time, which makes them as good as new. The same can be used for removing enamel paint stains from floors (although unfortunately it doesn’t work on clothes!). Also while sticking objects on the pots use white glue instead of the others as it holds fast. Once a pot breaks, it’s gone, but fixing the pieces together with a paste of Plaster of Paris does restore them sometimes.

Uses

After having finished decorating a pot one gets a great sense of satisfaction and pleasure which is far better than any gift. These clay pots and vases not only decorate your house but they are also excellent gifts for people of all ages. Also if you are interested in other hobbies such as dry flower arrangement, you can arrange those flowers in these pots too. And then who doesn’t like to be appreciated (and believe me, a single good, original pot brings a lot of attention and appreciation). Apart from all this you can also hold exhibitions, take part in various competitions etc. and win gifts, money and get different ideas.So the next time you feel bored, don’t just sit around but pick up some clay pots and then let you imagination do the rest. I can guarantee that you won’t regret it.

Thursday, March 6, 2008

Paper maché: a clever use of waste paper

A few months back I visited the arts and crafts mela, organized by Lok Virsa, in Islamabad. There at the paper maché stall, I availed the opportunity to learn the art of making products from waste paper. Later when I tried my hand at it, at home, I moulded many decorative and attractive pieces like jewellery boxes, dishes and plates and even delicate and chunky jewellery to match my wardrobe. So I bet that after learning this art, you also would love to try this hobby.
Before giving you instructions about this old craft, let’s discover its background. It was back in around AD105, when T’sai Lun, the Chinese man who is known to have invented paper, also discovered other possibilities for its use besides writing on it. One of his ideas was to fashion solid objects such as trays and decorative boxes, from paper combined with glue.
The ‘pulped paper’ technique appeared in Europe, in France, in the 17th century. It reached England by 1672. It was here in 1772, that Henry Clay introduced a method of pasting paper sheets together. It was called ‘paper-ware’. In 1816, the name ‘paper maché’ was applied by the manufacturers of the time — Jennens and Bettridge of Birmingham, England.
In Asia, it is said that paper maché is a traditional craft of Kashmir, where the artisans made clever use of waste paper to produce all kinds of items. The paper maché industry was very popular with the Mughals. Today this craft is making great strides in Kashmir with the growing vogue for artistic goods.
The craftsmen to produce a product stick several layers of paper on a mould. When dry, they use water colours to paint motifs on the final layer. For preservation of these colours and designs a final coating of varnish is applied.
Today fancy goods such as flower vases, lamp shades, book ends, trays etc are in great demand. An interesting product is a ‘mask’ — available in various designs, shapes and colours. They are used in dances in India.
There are two basic techniques — layering and moulding for beginners. Laying is simpler. You should only use newspapers. Magazines aren’t thought of as good enough. Other material you’ll require is: fine sand paper, sharp knife, brushes, white glue, tissue paper, flour paste (in one glass of water mix 1-1/2 tablespoon of flour and two pinches of salt, bring to boil, stirring quickly to prevent lumps from forming until the mixture is smooth), water colours, varnish, pencil and scissor. Cover your work place with newspapers to prevent a mess. Tear up newspapers into two-inch squares (never cut with scissors, just tear). Cover the back of your mould with damp tissues. This will later make it easier to remove your creation from the mould. Then brush the newspaper pieces with paste. Stick them down to your mould covering it entirely by overlapping the pieces slightly. Smooth the wrinkles. When the first layer is dry, apply another layer. Apply about 15 to 20 layers. Leave to dry further overnight. Drying time can be hastened by drying in a pre-heated oven.
After it has dried completely, trim the rim carefully with a sharp knife or scissors. Finish your dried object by sanding until it is quite smooth. Paint your piece (two coats are ideal). Varnish with two or three coats of varnish, letting each one dry before applying the next. Car spray paints add a metallic lustre. Now it’s a time to show off your creation. (Amna Nasir jamal)

Wednesday, March 5, 2008

HAVE A GREAT PARTY


Planning a memorable party. But how can you make? So here are few touches and new outlook can make really your party great.
* Make a list of guest ahead.
* For more lasting impression, put little effort. Send printed messages. Cards are easily available. It’s cheaper to send hand made or do it with your computer and printer.
* To make your party more festive and glamorous design entrance by using lights around your doorway or with candles especially floating or terracotta diyas and balloons.
* If small place is a problem, strategically arrange several small tables with food even in a single room and to get people to move around and mingle.
* To break the ice, have some jovial guest and also who can play instrument and sing.
* It isn’t proper time to experiment new recipes. Stick to mastered dishes to minimize culinary disaster.
* If hiring services, contact always those who offer attractive package at reasonable and economical rates and are reliable.

Tuesday, March 4, 2008

HOW TO DRY FLOWERS


Usually people get ready made bouquets from the florists but the flowers dry up after a couple of days. However, there are various techniques, which can keep your bouquets in their vases for a longer period of time. To dry a flower, you may use either of the two techniques:
AIR DRYING:
Lavender, feverfew, breather, larkspur, straw flowers and yellow yarrow are good flowers for this method, very simple. In the morning, when the dew has evaporated, cut the flowers. Remember to cut the stem as long as possible. Hang these upside down in a cool, dry and airy place, after tying them in bunches. In a couple of week you’ll definitely get the reward for your patience.

MOISTURE ABSORBING:
Best flowers for this method are the rose, daisy, chrysanthemum, dahlia, delphinium, purple and white yarrow, hydrangeas, pansy and zinnia. Mix borax and oatmeal in equal proportions. Take a plastic box and line it with aluminum foil. Fill a one-inch layer of the mixture. Place one to five (depends on container’s size) flowers in the box and sprinkle the mixture over the petals cover them completely. Cover the container. It takes between four to fifteen days to dry, depending on the flower’s type. When flower feels papery, it is ready. Remove from the mixture, clean off with a soft brush.

Monday, March 3, 2008

CRAFT OF CANDLE MAKING


Candle making today is not only a hobby and craft; it is also a means of earning. It is not a difficult craft to learn, all you have to do is gather the required materials.


MATERIAL:
Candles are made from good grade candle wax and braided wick. Other materials one required are moulds (standard metal or plastic moulds, ice-cream cups, drinking glasses, card board containers etc.), double boiler, gloves, a plastic tub, a good pair of scissors, dye colours, fragrance of your choice, a measuring cup or kettle with spout to melt and pour the hot wax, wooden spoon and news papers.


METHOD:
Cover your work area with newspapers and wear gloves. Break the wax into small pieces, place in double boiler till it melts. Cut the wick a few inches longer than the mould’s height. Place one end at the bottom of the mould, pull it to the top and tie to a metal rod. Add colour to your hot wax, stir with wooden spoon until colour is even. Add fragrance just before pouring the wax into the mould; place the mould in a tub of cool water. Water level must be below the mould’s top. Allow it to cool completely (at least six hours or overnight). Trim the wick, remove from the mould. If candle doesn’t slide out easily pour hot water over the mould. Remember never pour left over wax in the sink it clogs the drain. So, what are you waiting for, let’s try out this inexpensive way of making candles.

Friday, February 29, 2008

Let’s throw a pot


Pottery is the oldest craft that man has pursued all around the world. It played a vital role in the evolution of civilizations. The potters kept this tradition alive for over 7,000 years. The earliest known pottery has on its surface a corded basket like design. In the development of the first human settlement pottery production played an essential part. The vessels enabled them to cook and store food and to keep liquid easily.The earliest fired clay was brought from Jericho, dating between 8000 and 7000BC. But the oldest known vessels were found on the Anatolian plateau (now Turkey), dating back 7000BC. The pottery was being made in Egypt and throughout the Near East around 5000BC at that time simple geometric patterns were used on the surface in coloured liquid clay called slip. In around 3000BC, the potter’s wheel was invented in the Near East which was in common use there 1000 years later. Egyptians invented the glaze in around 3500BC.Chinese pottery made in 3000BC was known for its artistic excellence and has set the world’s standard since ancient times. Chinese in the third century BC produced the glaze. Koreans introduced decorative style pottery. For the tea ceremony Japanese potters have devised their famous wares.During Cretan Bronze Age (2800 - 1100BC), the Minoan civilization, on Crete, made the first Aegean pottery. The Greek mostly used black and red colours in their pottery; they also invented orange, red and black slips, in the Attica region of Greece that style flourished from 1000BC to 400BC.In its technical and artistic excellence Islamic pottery is second only to the Chinese; influenced by European pottery, Muslims rediscovered the tin glaze technique in the 9th century which was used by Assyrians in 1100BC.Christian pottery history, from the Middle Ages, is well documented by the Muslims. By the 13th century, the technique of tin glaze had spread to Spain and Italy. The Italians discovered the technique known as majolica (elaborate decoration painted over plain white tin glaze), the French and Dutch developed faience and delft (variation of majolica). In the 14th century stone ware production began in Germany. In the 16th century Italy and France developed porcelain but in 1708 only Germany was making true European porcelain.Since the beginning of the Indus Valley civilization man has turned to clay for the fulfillment of self-expression. By virtue of unique methodology this art flourished in areas in close proximity to lakes and rivers. The ancient potters had to cater to the multifarious needs of the different segments of society — combining utility and aesthetics. They churned out vessels for various purposes, for common man and dolls and toys for children and decorative penal art pieces for worship place adornment and elite homes.In Pakistan the tradition of pottery incorporated two distinct trends, the pre-Islamic (around 5000BC) and Islamic (around 8th century AD) The discovery of the ancient cities of Moenjodaro and Harappa, that were the Hall mark of the Indus valley civilization (2500BC) are a significant landmark in history. During this time exquisite pieces of art were created by the artisans of this civilization. This pottery is well known as Hala pottery today.Pottery making has become a hobby that everyone enjoys at home. One can try simple projects at first. All you need for good pottery work is good quality clay. Tools are inexpensive; you’ll need a ruler, a knife, rolling pins, sponges, cutting wires, small paint brushes and modelling tools.Wedging clay (to squeeze and press the clay to remove trapped air bubbles for smooth texture) is an important process. One can make pots using the pinch method (this doesn’t require many tools), making slab pottery (suitable for contemporary pottery by forming clay slabs), coil pottery (formed by hand, one can produce a number of pieces). And after lots of practice and mastering the skills later one is able to make a pot on a potter’s wheel. So let’s see if you have what it takes to create beautiful pieces of art using simple clay.

Thursday, February 28, 2008

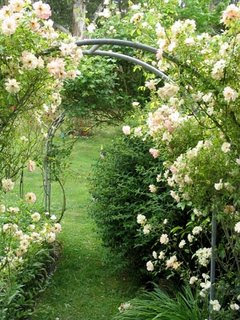
CREATE WORTH-SEEING GARDEN


It isn’t too hard if want to be a patron of worth-seeing garden. It’s a passion. Woven together colors and textures to create a garden, it gives a thing ---- people admiration. By following these points, you would be able to turn dream garden design into reality.


* Observe wind direction, areas of light and shade.

* Guiding principle in designing garden is to create a harmonious whole with the house and its surrounding.

* Paint garden furniture in dark colors to show plants ----- especially green foliage.

* Pick a shady area to place chairs, pots and sculptures.

* Group together different plants of one colors.

* Use several plants of same species and thread them through each bed to give continuity and movement to overall composition.

* Use a palette of different tones of one color.

* Tall grasses are wonderful for their movement and the way they catch evening light.

* Prune bushes to eight or ten inches, it encourages good growth and larger blooms.

* Rotate your fertilizers. Use a combination of chemical and organic.